The process of planting a young tree is not particularly difficult or time-consuming. But it must be done properly and with care. The success of planting will depend on choosing the right species for the site and on providing an environment in which the young trees will thrive.
Hands-on techniques for planting a tree
Not sure of how to plant a tree? Choose the correct method of planting based on the size of your tree. We demonstrate three of the mopst common methods below.
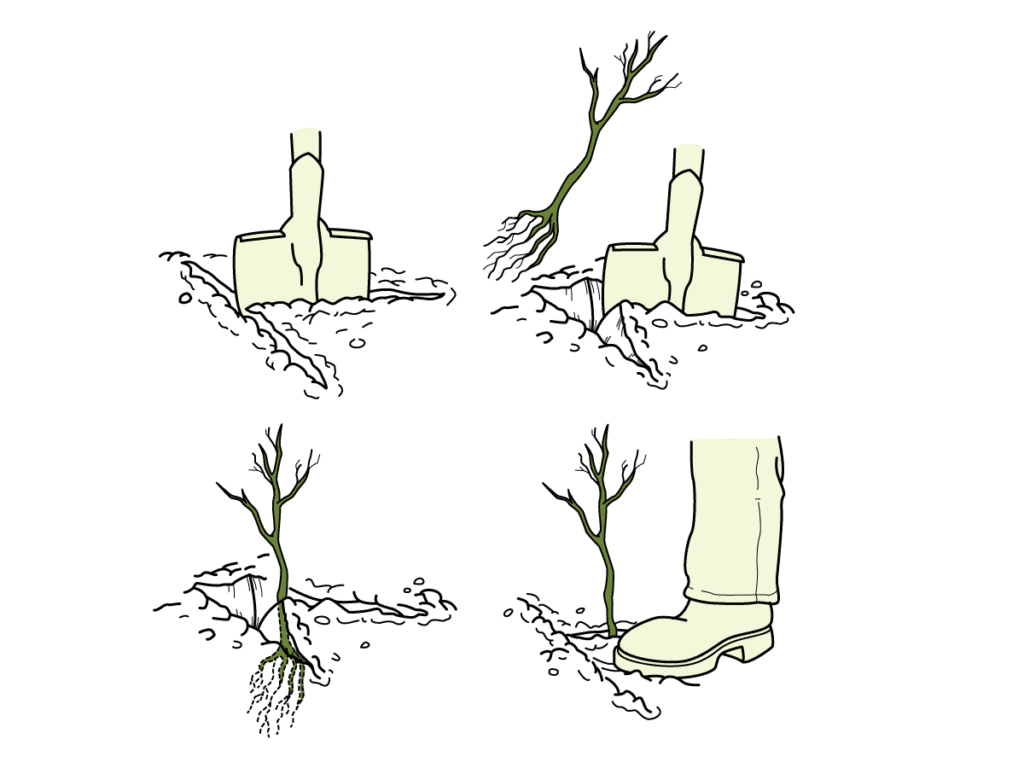
Notch planting
Notch planting is the quickest method for bare-root trees up to 45cm in height.
Cut a notch with a spade or mattock and, whilst holding it open, slip the tree in and spread the roots. Make sure the root collar is level with the soil surface. The root collar is the part of the tree’s stem that was at ground level when it was growing in the nursery – the stem often changes colour at this point.
Then tread the split closed with your foot and check that the tree is firmly planted with a gentle tug.
If you are planting lots of trees, this can be done in pairs – one cutting the slit and holding it open, while the other plants the tree. Each pair of planters should have a well-defined area to cover.
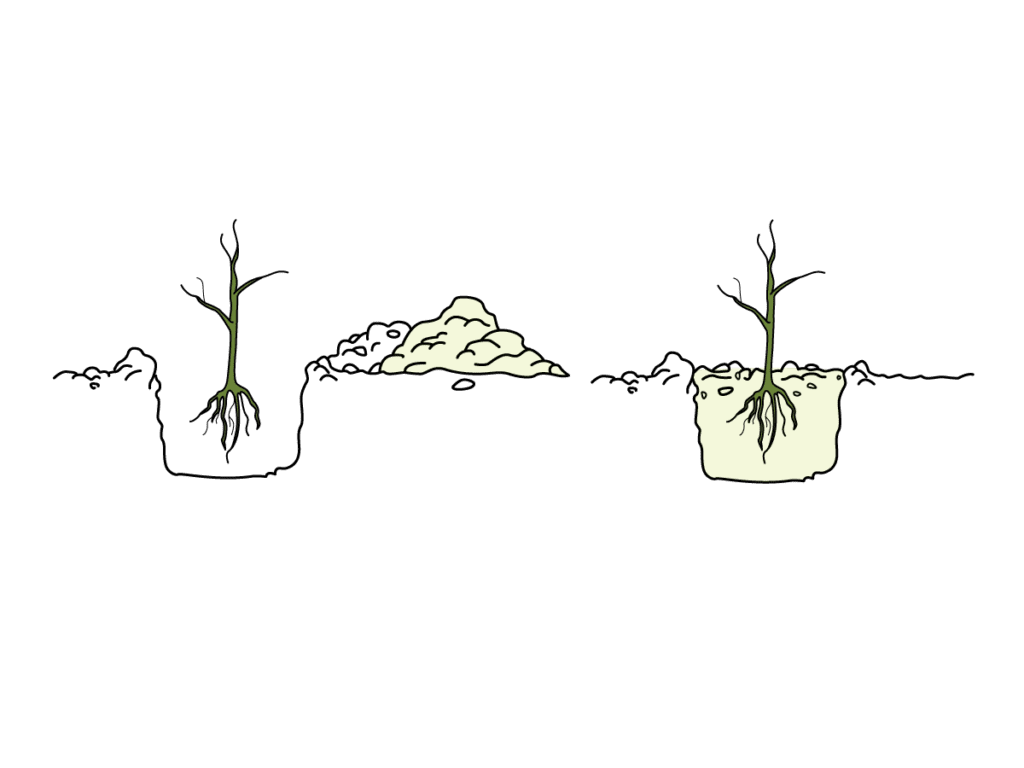
Pit planting
For medium-sized trees, up to 1.5m in height.
Make sure the holes are large enough to take the entire root network.
Mark out the positions of the holes before digging commences, otherwise it is easy to end up with too many trees at one end of the site and too few at the other.
For larger planting projects, work in teams of six: two pairs digging the holes and one pair planting the trees.
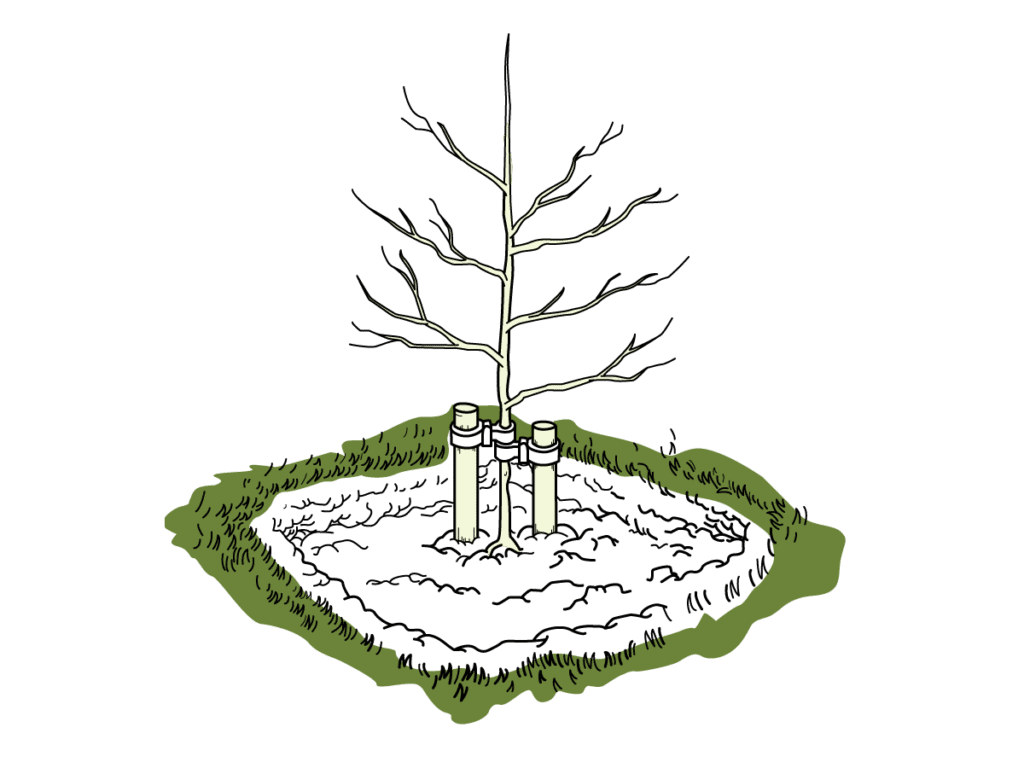
Pit planting and staking
For large trees, over 1.5m, including fruit trees and specimen trees.
A short stake with a single tie or a double stake with two ties are the best methods. Aim to anchor the root ball in the ground while leaving enough stem free to sway.
Drive the stake in before planting the tree and always place the stakes so that the prevailing wind blows the tree away from the stake(s).
After staking and tying, water well and make sure the ground is firm all around the tree. Ideally, mulch with bark chippings or compost on the surface of the soil, keeping it a few centimetres away from the base of the tree’s trunk.
Protecting
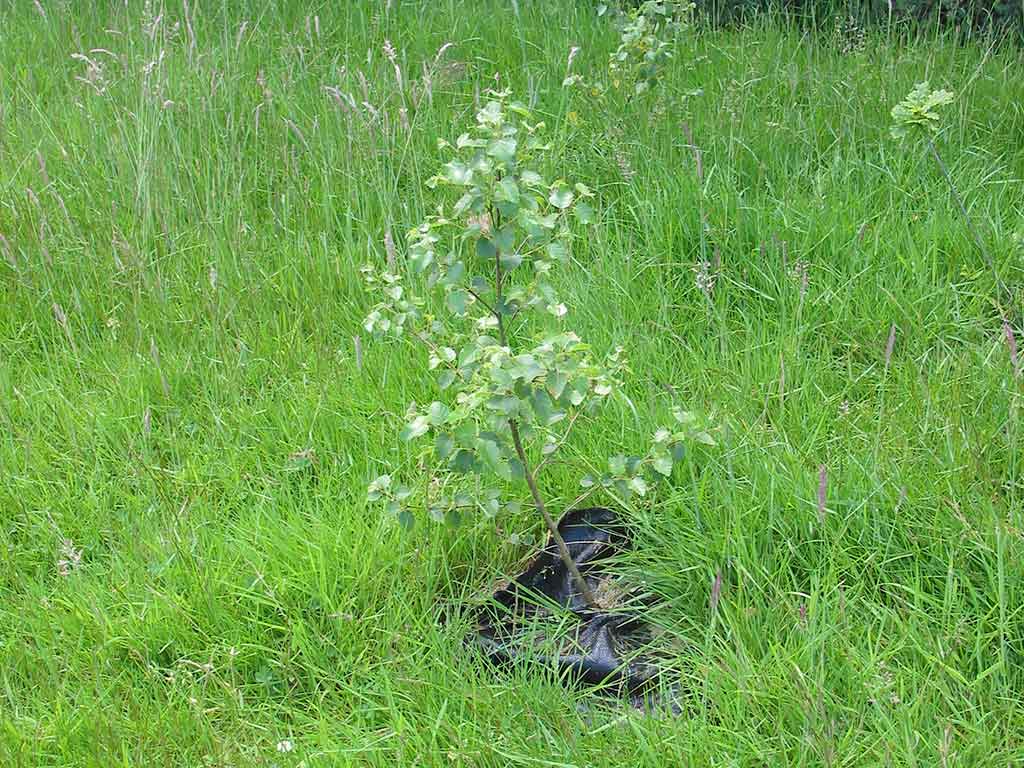
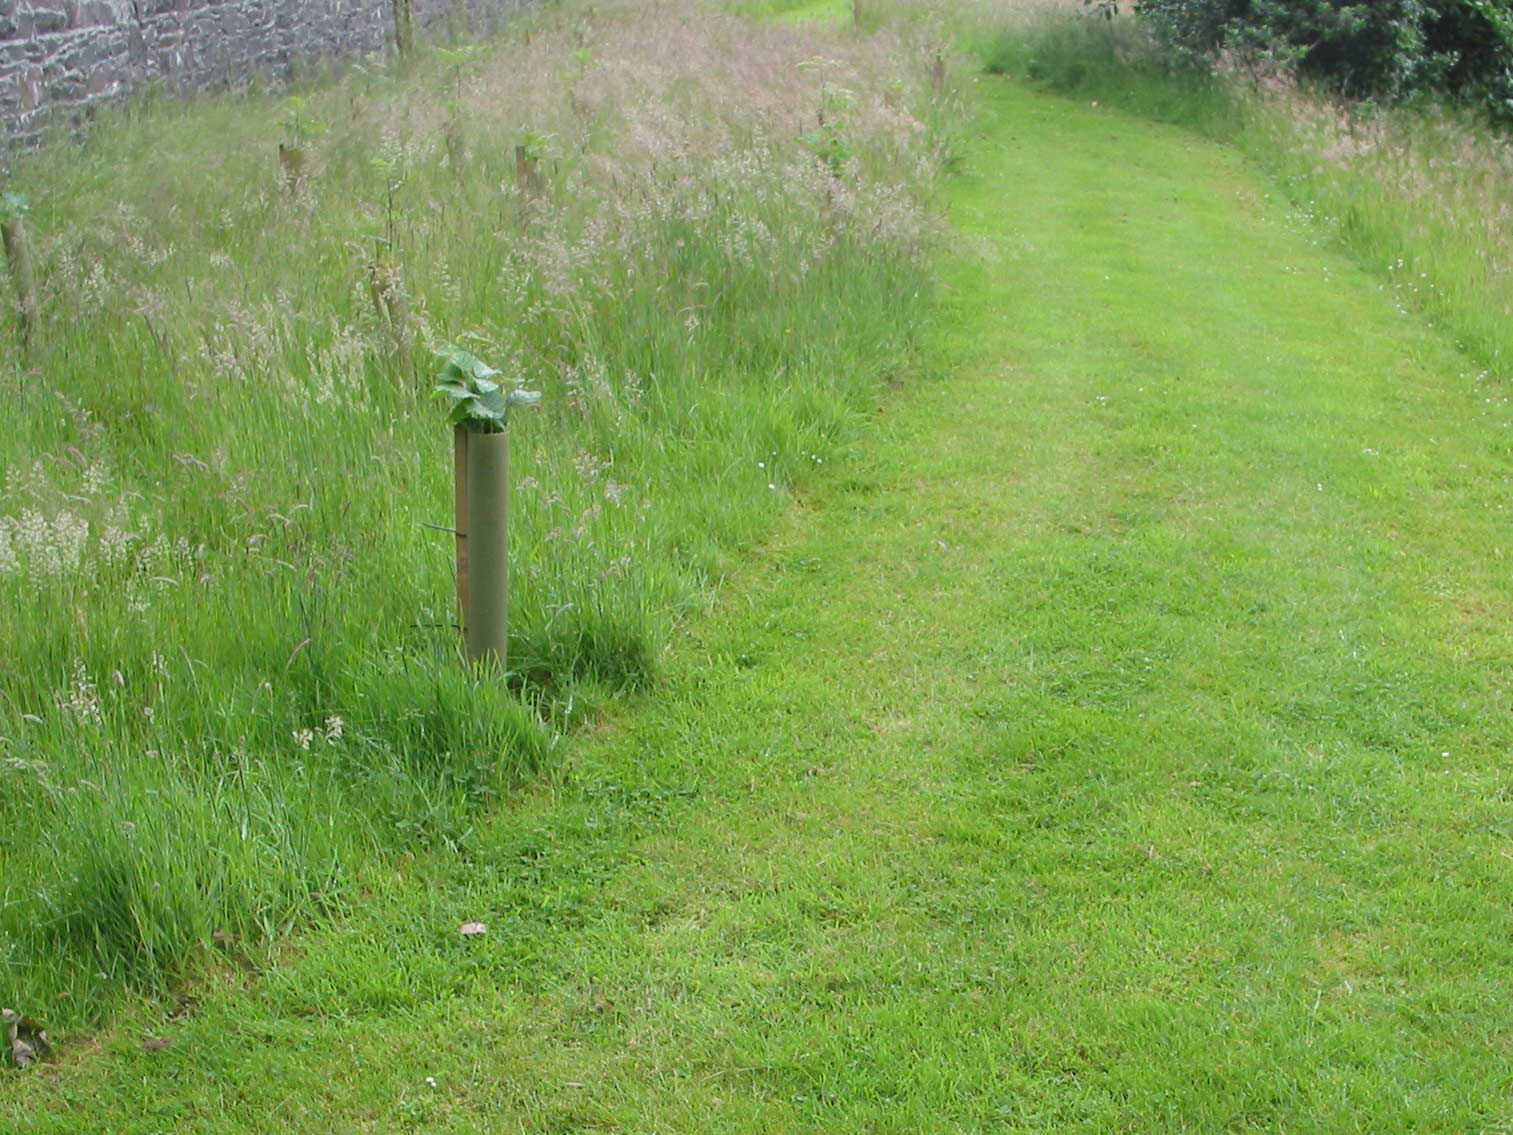
As necessary, protect the trees with tree shelters or guards, against voles, rabbits or deer. Shelters also enhance growth rates. Take steps to deter vandalism or accidental damage. This can be done by letting vegetation grow up to hide the young trees for example.
Maintenance
Looking after your young trees is a critical step. Just a few minutes of tender loving care each year, for the first few years of life, will ensure that time, money, effort and energy isn’t wasted and the trees live on providing new habitat to support wildlife and lock up that CO2.
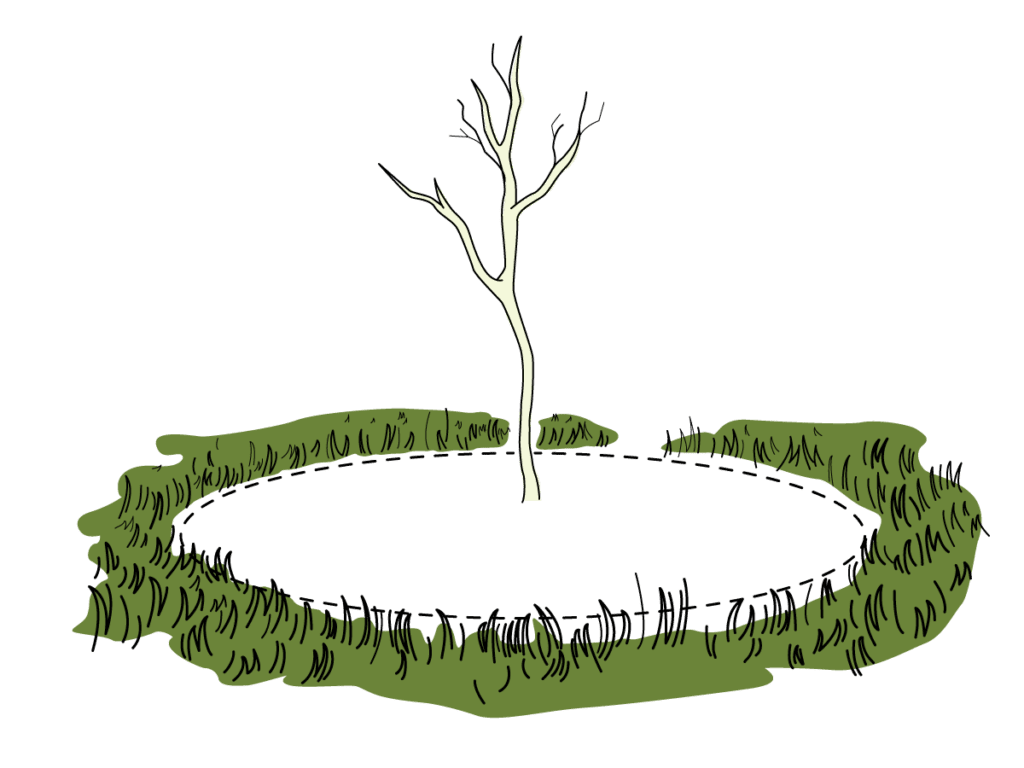
Weeding
An area of at least 1m diameter around each tree must be kept weed-free for at least three years. This is the most important part of tree planting. Survival and growth rates of weeded trees are hugely better than those of unweeded trees. Mown grass around each tree is the worst option, as grass competes strongly with the tree and mower damage to the stem is likely.
Use a thick layer of loose mulch, renewed at least annually, a mulch mat or, less preferable, apply weedkiller (organic if possible).
Regular checks
In addition to weeding, check that guards and shelters are correctly positioned. Any trees that get damaged can be cut back to ground level and may sprout again. For woodland groups, thin selected trees after about 10 years. Commence coppicing after about 7 years. Start planting woodland flora once the canopy has closed over.
Season
November to March, i.e. while trees are not actively growing, but not in frosty weather or when the soil is saturated. Autumn planting is preferable for most trees because the roots develop slightly over the winter.
Preparation and working with groups
Site visit
Visit the worksite in advance to gain a clear idea of what you will be doing on the day.
Assess the suitability of the project for the group you will be leading and the time available.
There must be a clear commitment to weed control and other management of the trees after planting. Weed control will be needed for at least three years, with further management depending on the type of planting. Planting without this commitment is almost always a waste of resources!
Check on the proposed planting layout and density. Check arrangements for the supply and short-term storage of the planting stock, along with tree guards, shelters and mulch as specified.
Check also that there will be water available on site and that you know the proposed planting density and layout.
Weather and ground conditions can drastically affect survival rates. Be ready to postpone the task at short notice if conditions are unsuitable.
Check for the whereabouts of underground cables before starting work.
Undertake a risk assessment for both project and site.
Tools and equipment
Depending on the size of the team adjust the quantity of equipment taken to the site. Bear in mind the site conditions and planting method to be adopted.
Ensure the tools are in good condition before using them:
- First aid kit
- Appropriate protective gloves
- Garden spades
- Trenching spades
- Mattocks
- Shovels
- Crowbars
- Small bowsaws
- Hammers (claw and lump)
- Mells
- Buckets
- Tree bags
- Secateurs or loppers
- Nails
- Site safety signs
Introduce the site, the work and the reasons for doing it. Walk around the site explaining what work will be undertaken. Identify potential hazards and explain how to work safely around them.
Demonstrate tool use
Demonstrate and explain the safe use, carrying and on-site care of the tools before starting work.
Demonstrate work techniques
Demonstrate all new work techniques as you come to them. This will save mistakes and avoid accidents. The first tree should be planted so everyone knows what they should be doing.
Plan the delivery of materials to minimise distances carried. Provide aids e.g. wheelbarrow to avoid manual handling.
Demonstrate the correct lifting technique (bending the knee and keeping the back straight so that the leg muscles are used and the back is not strained).
Organisation of your team
Divide the team into pairs, teaming beginners with more experienced people.
The most efficient way to work is to form a production line, each team doing a specific job, e.g. digging holes, hammering in the stakes, planting the trees and attaching the shelters/guards. Swap pairs around at tea or lunch breaks.
When planting a mixture, plant clumps of each species to minimise the possibility of one species out-competing another, unless otherwise indicated by the site plan.
Keep the fine fibrous roots moist and out of the wind at all times.
Trim any damaged roots or shoots.
While trees are on site they should be heeled in or covered in wet sacking and moistened regularly. Alternatively, use tree bags with a black inner and white outer.
Plant trees upright and to the same depth as they were previously growing – use the root collar or soil mark on the stem.
Tread the soil firm after planting and check the tree to ensure it is firm and upright.
The leader should check, assist and encourage people and ensure work standards are maintained.